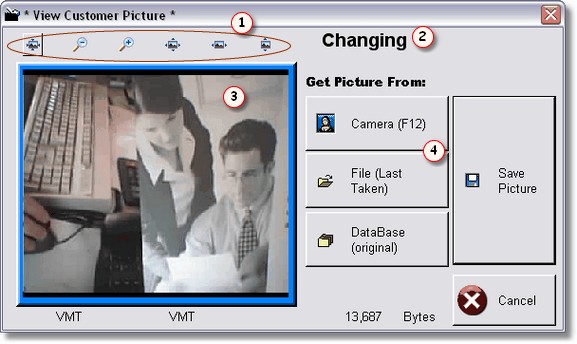
Photo ID is a very secure way to make sure your customers are who they say they are. If the customer already has a photo on file, it will be displayed on the POS screen. When you press the F12 button, the screen above will be displayed with their picture if they already have one, and the message ![]() will say changing. If they don't have a picture, the message
will say changing. If they don't have a picture, the message ![]() will say Adding, and the picture
will say Adding, and the picture![]() should show ' NO PICTURE ', or it will be blank.
should show ' NO PICTURE ', or it will be blank.
Once a picture is taken it will display in the photo box ![]() . If you already had a picture on file, you may compare it by clicking on the Database (original) button. The old picture will display. To see the current picture again, click on the File (last taken) button. Once you press the save button, the database picture will be overwritten with whatever picture is on the screen, usually the picture you recently took, stored in File (last taken).
. If you already had a picture on file, you may compare it by clicking on the Database (original) button. The old picture will display. To see the current picture again, click on the File (last taken) button. Once you press the save button, the database picture will be overwritten with whatever picture is on the screen, usually the picture you recently took, stored in File (last taken).
You can use the buttons ![]() above the picture to zoom in, scroll, or see the picture in it's real size.
above the picture to zoom in, scroll, or see the picture in it's real size.
To take a picture, simply click the button that says ' Camera F12 ' or press F12.
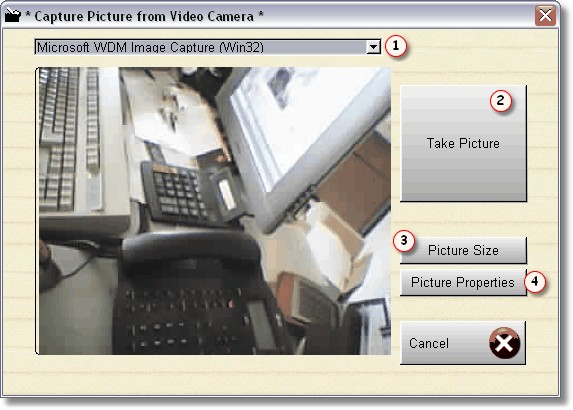
When you get to this screen, it will be live video if it is from a Web Cam. So just click the Take Picture ![]() button when you're ready.
button when you're ready.
If this is the first time you've ever taken a picture, you may want to set a couple of things up. First, you must select the camera. Now for our system, we had 2 camera's installed in the system, but we are only using one. But we still chose Microsoft Image capture ![]() for the device, you can do whatever works.
for the device, you can do whatever works.
When you click on picture size, your camera's software is what will actually be accessed. So the screen below will probably not look the same:
Here I can change the size of picture the camera will be taking, and therefore storing. 160 x 120 is usually the smallest, so you can save more pictures, but they are kind of grainy. 320 x 240 are good pictures, but obviously take twice as much storage. 640 x 480 is usually the largest, and really not necessary, and also not possible at the current time. The maximum is 352 x 288.If you have good lighting and the subject is standing in the right spot, a 160 x 120 picture will let you verify that is the same person.
The database that holds the pictures can only hold 2 gigabytes of information, which is actually huge.
Resolution |
File Size |
Approx Pictures |
160 x 120 |
5k |
200,000 |
320 x 240 |
12k |
83,333 |
352 x 288 |
15k |
66,667 |
Picture Properties ![]() are used to adjust brightness, saturation, hue, etc. This depends on your web cam. Click on it to find out.
are used to adjust brightness, saturation, hue, etc. This depends on your web cam. Click on it to find out.