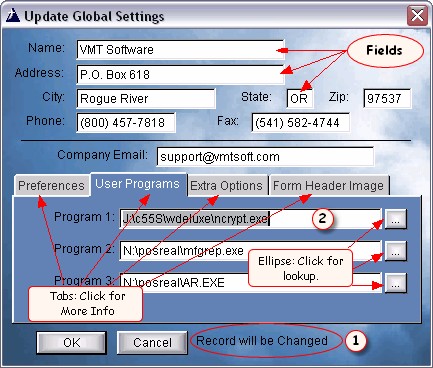
NOTE: the above screen is a sample screen from our contact program, but the concepts are the same.
Editing a form or record is very easy. When the form first displays, you will normally be on the first field. You can see if you are adding or changing or deleting a record by looking at the message (1).
Just start typing. When you are done with that field, press Tab to advance to the next field. To go backwards, press Shift Tab. You may of course use your mouse to go from field to field. If you are editing a field that already has information in it, you may want to double click in that field. That way all of the text is highlighted (2), so when you start typing, the highlighted text is overwritten. If you click once inside of some text, the text you type will be inserted where you type.
If there are ellipse buttons, you can click on them to lookup information. Also remember to click on the Tabs. Tabs are a way to organize the information for one record without having to put all of the fields on one screen. It makes it easier to find the information, and makes this look better.
When you are finished, click the OK button to save your record. If you click on Cancel or exit without clicking OK, your record will not be saved. Many times there is a warning for this. You can also just press Enter to save your record.
If a field is required it will usually be a different color, and if you try to save a record with a blank required field, it will beep.
In many cases you can lookup from lookup tables by right clicking on the field. And sometimes you will be able to right click on a date field to display the calendar. This is not all the time, but we try to put it in as often as possible for your convenience.